Start blogging with GitHub and Jbake
18 January 2019
Hosting of personal blog, company blog or landing page of your project - easy enough with github. In this post i will try to explain how to do it in two steps.
Step 1. Deploy static content to GitHub
First of all we need an account on github and base knoweledges about git. Actually, as i know, another popular web-based Git-repository GitLab also supports hosting of static content, so you can choose what you like more.
Now you need to create new project named as [account].github.io For example: kostenkoserg.github.io
Actually, we already did all necessary preparation for our hosting. Now just clone the project, create simple index.html and push it back to the repository:
$ git clone https://github.com/kostenkoserg/kostenkoserg.github.io.git
$ cd kostenkoserg.github.io
$ echo "Hello World!"
$ git commit -m "my first github page"
$ git push
Congrats! Our new site currently available over world wide web: https://kostenkoserg.github.io

By the way you also can use existing domain for your GitHub based site. For do that you just need to
- Add
Arecords to your DNS provider with GitHub IP's - Provide in GitHub project settings your DNS name
Step 2. Static blog generation with JBake
Jbake is a java based open source solution for static site generation. For JBake available integration with Gradle and Maven. Jbake out of the box supports Bootstrap and can be easy integrated with other CSS frameworks. As template engines JBake supports Freemarker, Groovy, Thymeleaf and Jade.
To start with let's download distribution from project site and extract the package to your favorite directory. Now we can generate static site with example content
$ /opt/jbake/bin/jbake -i
As result we should have site template with next structire:
├── assets
│   ├── css
│   │   ├── asciidoctor.css
│   │   ├── base.css
│   │   ├── bootstrap.min.css
│   │   └── prettify.css
│   ├── favicon.ico
│   ├── fonts
│   │   ├── ...
│   └── js
│       ├── bootstrap.min.js
│       ├── html5shiv.min.js
│       ├── jquery-1.11.1.min.js
│       └── prettify.js
├── content
│   ├── about.html
│   └── blog
│       └── 2013
│           ├── first-post.html
│           ├── second-post.md
│           └── third-post.adoc
├── jbake.properties
└── templates
    ├── archive.ftl
    ├── feed.ftl
    ├── footer.ftl
    ├── header.ftl
    ├── index.ftl
    ├── menu.ftl
    ├── page.ftl
    ├── post.ftl
    ├── sitemap.ftl
    └── tags.ftl
Let's generate site from above
/opt/jbake/bin/jbake -b
After that we will have direcory output with our static site.
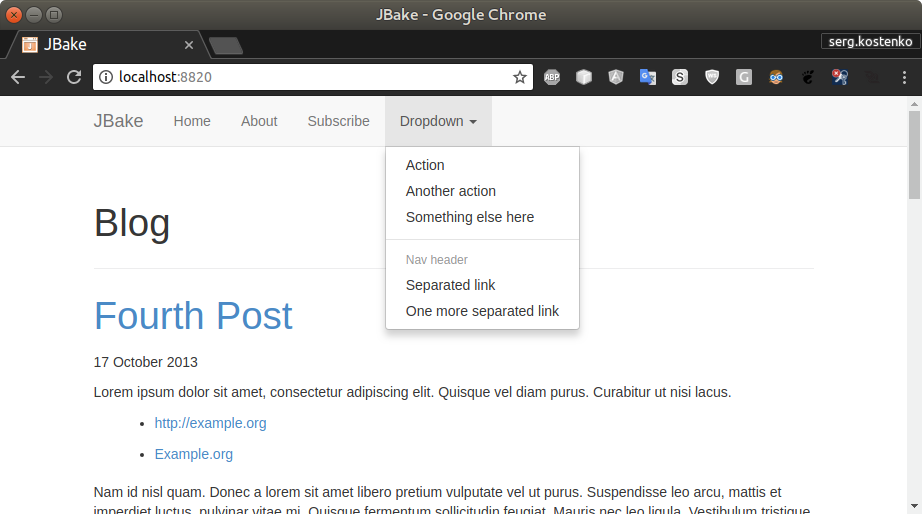
To check the result you can start embedded server and open http://localhost:8820/
/opt/jbake/bin/jbake -s
Well done! Our static site ready for blogging. You just need edit content of content directory, regenerate site and push output to GitHub repository.
Jbake supports few types of content: HTML, Markdown, AsciiDoc, - that is greate and allow you blogging with your favorite text editor. For this blog I am using Atom и Markdown.